Have you ever thought about what the role of red color lights behind your car is? Those are the taillights that turn on the moment as the headlights are turned on. The moment the car is stopped, they flash a bright red light and produce dim red light when the car is in motion. Just like other car parts, this car part becomes faulty and can be resolved via tail light assembly replacement.
Where Exactly are the Tail Lights Located?
Taillights are present at the rear end of the car. Some of them are made of reflective material, which makes them appear bright and large. In certain parts of America, it is mandatory to have red color tail lights.
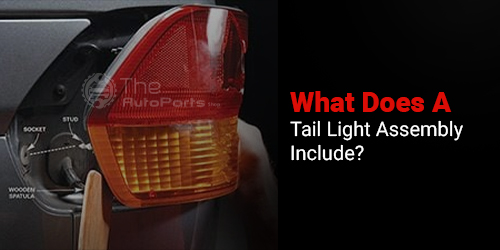
What Does a Tail Light Assembly Include?

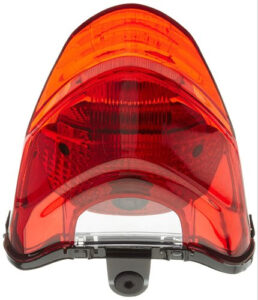
An aftermarket Taillight assembly is a combination of tail lights, brake lights, and reversing lights. Each light plays a specific role during the night. The taillights are generally wired and illuminate the moment the position lamps are illuminated. The brake lights start working the moment the driver steps on the brake pedals. These lights are bright and are installed in a pair on both sides of the car.
What is the Cost of the Taillight Assembly?
The tail light assembly cost levied by the dealer lies between $200-$2000.If you own a luxury car, the charges will be more. It is better to purchase a part from a renowned and trusted store such as ‘The Auto Parts Shop.’They bring authentic and top-quality parts that are delivered within a day. If you feel that the tail light assembly replacement is costing you an arm and a leg, you can fix it on your own, costing $30-$250 per assembly.
Signs of a Bad Tail Light
If you notice any symptoms mentioned below, it is possibly due to bad tail light. The tail light assembly replacement is the only way to fix the problems. Let us dive deeper into signs of a bad tail light :
Bad Tail Light Fuse
The fuse is the first thing that must be inspected when the tail light becomes bad. A fuse is basically a metal band enclosed in a plastic container that explodes when the current flowing through it becomes too high. It plays a significant role in the vehicle as it protects other components from damage. The fuse is generally present in the two areas of the vehicle:
- Fuse panel present within the cabin of the car. It is generally present at the front passenger side behind the plastic panel and under the dash. In certain cars, it is found at the side of the dash from where the passenger side opens.
- The second most prominent area where you’ll find fuse is the main box under the hood. A lot of wires are attached to the black box. Remove the top, and you’ll be able to access the fuse box.
Check the fuse that holds the tail light and test it using a fuse tester if the fuse illuminates when the light is working properly. On the contrary, issues with the fuse must be resolved by purchasing a new one with the same size and amperage. In certain fuses, you will find cracks in the metal wires, which is a serious issue.
Bad Tail Light Bulbs

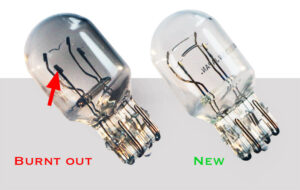
If the fuse is working properly, the next thing to be inspected is the tail light bulb. Firstly, take the tail light bulb out; some cars have access panels to access these bulbs. Twist the bulb, take it out and insert the new one instead.
The best way to determine a bad bulb is by separating it from the socket and looking at the filament closely. The filament is the wire within the bulb that lights it up. Broken filament means no illumination, so replacing it with a new one is a better option.
Socket Failure
At times the socket bulb goes bad due to the moisture seeping within. However, Poor wire connection also leads to socket failure. If both the bulb and fuse are working perfectly then, the next thing is the socket that needs attention. Primarily you must inspect discoloration like black, blue or brown along with bent and broken pins.
Worn Out Wires
Despite the properly working fuse, if no electric current enters the system, it is possibly due to the broken or damaged wire. All you need is a proper wire diagram and check the insulation for broken wires or cracked circuits.
Failed Control Switch
Sometimes the tail lights don’t turn on due to failed switch. The headlight switch on the dash must be checked after you’ve inspected everything, and it turns out to be good.
The switch turns the headlights, taillights and parking lights on. If other parts are working properly, then monitor the control switch properly. Separate it from the dashboard and check it using a multimeter to determine whether it has failed.
Dirty or Bad Ambient Light Sensor
Present-day cars have ambient sensors using which you can turn the headlights and taillights on and off as per the day or night time.
Step by Step Replacement Process
Once you have determined the symptoms of a bad aftermarket tail light assembly, take the car to the mechanic and get these issues resolved. In case the replacement is going over budget, you can perform the replacement process on your own as we have come up with a step by step process for you:
Prioritize Safety
Safety is a crucial aspect, and there are no compromises on it. Disconnect the car’s battery and access the tail lights via hunch or rear hatch. It is better to perform these steps in light or take a flashlight while performing the steps. Some cars have panels that need to be removed using a screwdriver.
Take the Bulb Holders Out
Once you find the taillights take the bulb holders out from the rear end of the bulb. Take them out by moving bulbs clockwise and take care of your hands while working on them. Put on your gloves and replace the bulbs with a new one. The bulbs remain clean due to the gloves and save you from injuries.
Eliminate the Tail Light Assembly
This is the most important step of the process. Take the tail light assembly out, and the next thing is the nuts; apply some grease and separate them from the assembly. The assembly would easily come out now.
Final Step
It is time to put the assembly back to the housing. It would be best to tighten the bolts before using a ratchet. Don’t keep them too tight as it would break the assembly. Replace the bulb holders and finish the process by replacing carpets and other trunk panels. Connect the battery again.
The Bottom Line
Tail Lights are a crucial safety feature in the car. Driving with a problematic one can be dangerous for you and other drivers on road. Determine the tail light replacement cost and follow the steps of the replacement procedure.
