Auto repairs and maintenance are mandatory, and at the same time, they are expensive. But, did you know that you can cut these costs and save a lot by doing it all yourself? Well, you can take some of the adjustments and self-care exercises, even if you are not an expert.
Let’s dive into the checklist required for DIY car care tips.
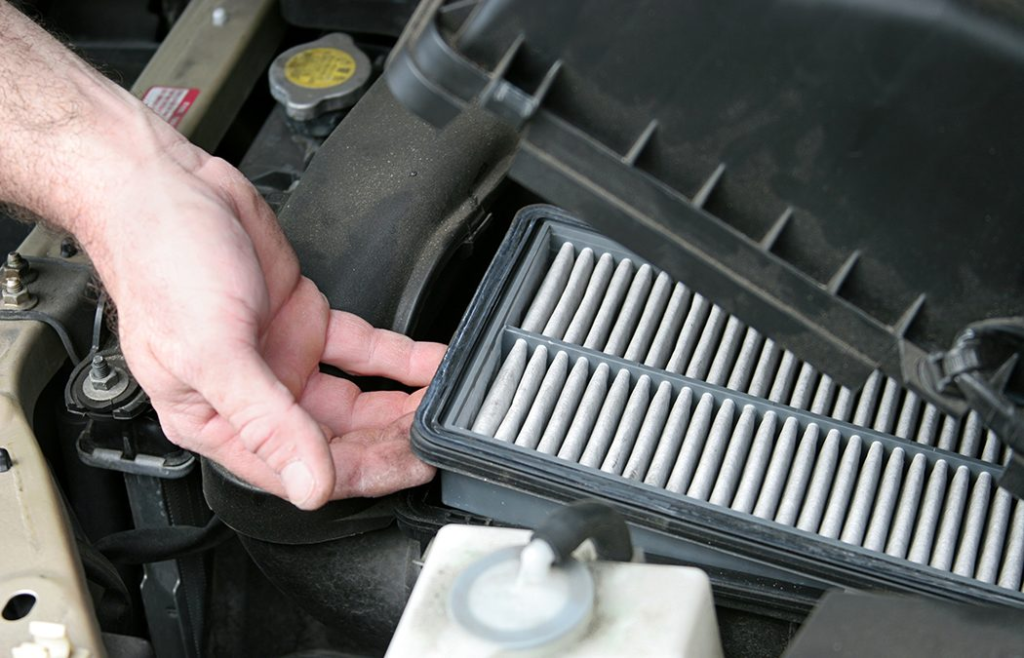
- Air Filter
Tools Required: None
Time duration: 10 minutes
Estimated cost: $ 10
Air filters require replacement after every 12 months or 12,000 miles, whichever comes first. For this, either you can hire a mechanic and leave your car for a day, or else you can also replace your air filter at home, which takes about 10 minutes.
Steps for replacement of air filter at home:
- Find your filter: You can locate it under your car’s hood, in a black rectangular box and metal clips on the side. Check your manual if you are unable to see it as you pop the hole.
- Open the casing, and check how the air filter fits inside it. You can make a note of its position and place.
- Now, take out the old air filter, and place the new one exactly as the old one sits.
- Close the metal clips when finished.
And you’re done! You can extend your new air filter’s life by hitting it with some compressed air as it removes debris.
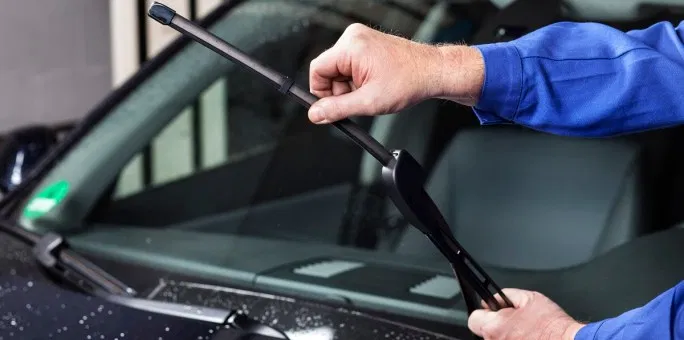
- Windshield Wipers
Tools Required: None
Time duration: 15 minutes
Estimated cost: $10 to $20
Your wiper blades usually last for six months or a year after regular use, and if they are not replaced on time, there are dangers of streaking that can cost you high.
Setting up a Wiper blade may differ in each car so that you may follow a few separate steps according to your car manual. However, the process remains the same:
- Lift the blades, as if you are washing windshield with hand, and then pull out the old blades.
- Notice the connection of the old blades to the metal parts.
- On most models, you will see a tab at the bottom of the wiper. You need to push this tab to remove the former blade.
- Now, attach the new blades. Be careful that wiper arms are not bent as they will scratch the windshield. Line everything up, ensuring that the new windshield wipers are secure and tight.
- If you are confused or can’t remember exactly how the new blades should fit the wiper arm, don’t worry. The box for the new blades would have a set of general instructions and a helpful diagram.
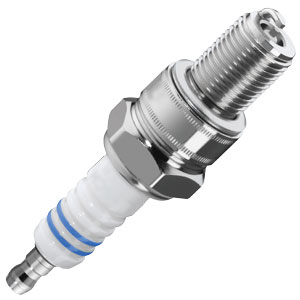
- Spark Plugs
- Tools Required: Spark plug socket, Ratchet/socket wrench, and 12″ socket extension
- Time duration: 20 to 30 minutes
- Cost: $10 to $15
Most spark plugs require replacement after up to 30,000 miles but check your manual to see if your car is different. While turning spark plugs may sound like a daunting task, it is straightforward. Don’t rush and be patient as installation requires attention for proper order.
- You can locate your spark plugs quickly as they are connected to thick rubber wires.
- You can find four, six, or eight seals, depending on your car’s number of cylinders.
- Do not detach all wires at once; instead, pull out the wire to the first spark plug. Since your spark plugs are installed in one command, so you need to maintain it.
- Use your spark plug and ratchet to remove the main plug.
- Add a new spark plug, tighten it first manually and then using a wrench. Don’t over tighten it!
- Re-connect the wire of the spark plug.
Repeat all the above steps for each spark plug. Just remember that one at a time! Also, the right plugs come pre-gapped, so you need not worry about gaps in that case. You can buy high-quality auto repair and maintenance parts at The Auto Parts Shop.
- Radiator Flush
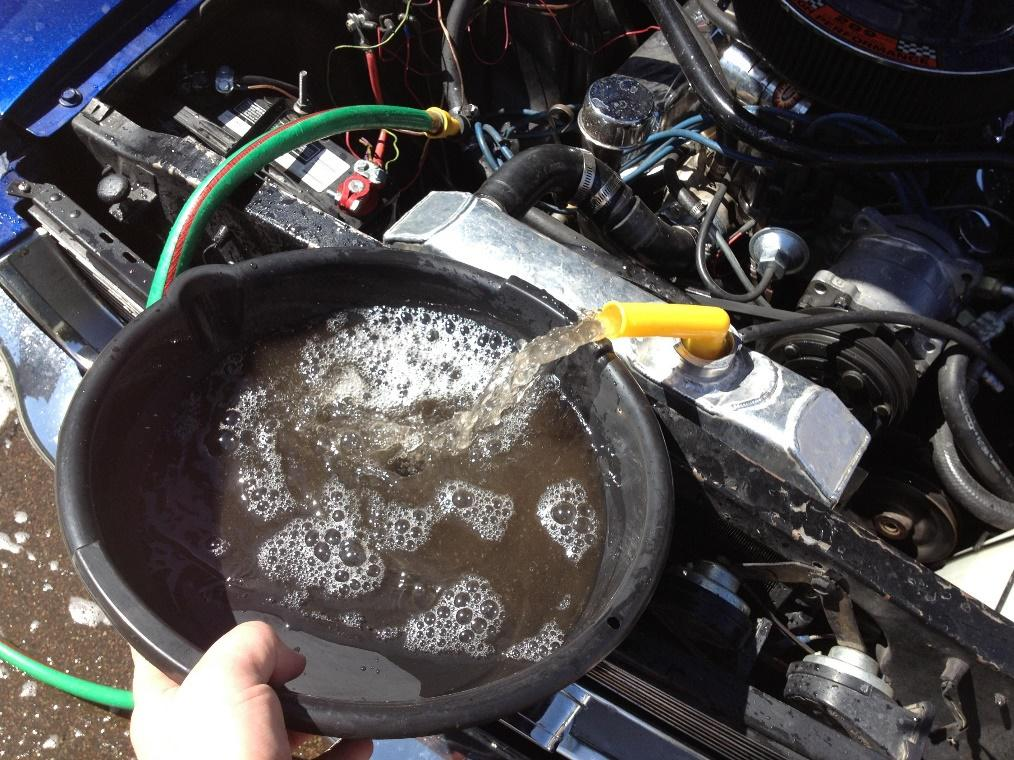
- Tools Required: A wrench, radiator flush solution, rags, funnel, coolant, and used coolant receptacle
- Time Duration: 30 minutes
- Estimated cost: $ 25
Your car cooling system and radiator must be clean to function correctly and efficiently. With regular wear and tear, your car heater makes deposits that can ruin the cooling system. Radiator Flush is a fast and inexpensive way to keep your system in shape. Check your owner’s manual to find out if you need to flush the radiator annually or after every two years.
- Make sure your car is entirely cool before you start.
- Check your master’s manual to locate the radiator drain plug. Put the used coolant receptacle in place, open the drain plug, and let the old coolant drain.
- Replace the drain plug and take out the radiator cap.
- Make use of a funnel to add the radiator flush cleaning solution and then fill water in the radiator.
- Replace the radiator cap.
- Turn on your car! Let it run and wait for the average operating temperature.
- Turn your heater on to the hottest position, and let the car run for 10 minutes.
- Now, turn off your car and wait for the machine to cool.
- Drain everything off the radiator and then put the fresh coolant in the radiator.
- Dispose of the old coolant safely to a hardware store, gas station, or mechanic as its enticing smell can be dangerous for pets.
Working with cooling is a step towards more advanced DIY projects. Temperature can be problematic when working on your car, especially the radiator, so make sure your engine is cold. Do not rush this work, and be patient and cautious.
Final Words
While performing any auto repairs and maintenance DIY projects, you must know what can be done and where the point is when you should stop. Don’t try an extensive DIY project that becomes difficult to handle. Do not take apart complicated pieces that you cannot put together.
Avoid injuries and save yourself a few bucks!