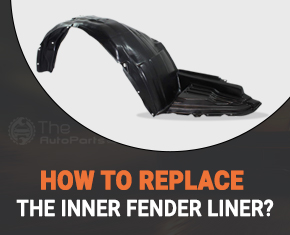
A daily-driven car experiences wear and tear as it matures. This is particularly true for the fender liners since they are subjected to harsh weather, gravel, and other road debris. To keep crucial (and expensive) components intact, you must repair your fender liners if they appear to be ripped. As we guide you through the task, follow along.
Each wheel well has a thick layer of protective plastic lined inside by fender liners, which are positioned above each wheel. This keeps out the elements like rain and frost and shields the suspension, steering, fuse/junction boxes and their connected wiring from foreign objects like pebbles and road treatments. A cheap way to safeguard the car’s more expensive components is with fender liners.
Although sometimes the plastic retainers fracture and give way, allowing the fender liner to slide on the ground or come into contact with the tyre, fender liner failure isn’t usually the result of road debris. High-speed grinding will easily ruin the liner before you can pull over using asphalt or a spinning tyre. The only solution is replacement, but thankfully all the parts are reasonably priced.
Despite the possibility of reusing car fasteners, doing so would be a false economy and, as your father would say, “throwing good money after bad.” The retainers and rivets are subjected to the same extreme circumstances as the liner, and while attempting to remove them, the plastic becomes brittle and breaks apart. Even if you manage to remove a retainer without breaking it, you still have to put it back in. Additionally, there is no assurance that the weakened retainer won’t shatter the following week. It now just costs a few dollars to replace them altogether, and you can relax knowing that your new liner will remain in place for another ten years.
WHAT TO BRING
1.New fender liner
2. Fender liner retainers
3. Jack and jack stands
4. Lug wrench
5. Torque wrench
6. Flat screwdriver
7. Gloves
1.Set the parking brake and park on a level surface. If you’re on a slanted surface, use wheel chocks.
2. Trucks and SUVs might not require you to remove the wheel, but many automobiles do. To make sure you can reach all the liner retainers, check the space available. If you can’t, remove the lug nuts from the wheel that is underneath the replacement liner. After that, jack up the car using the proper jack point. Always use jack stands to secure an elevated vehicle.
3. Find all the retention holes by laying the new liner on the ground. You can see here how many and where the retainers are located in the old liner of your car.
4. One at a time, take off the fender liner retainers. To reach the plastic cap, use a flat screwdriver. The retainers are not threaded like screws and will pop out, so twist the handle a quarter turn after that. Proceed to the next one after prying off the plastic base with the screwdriver. A single liner may include more than a dozen retainers.
5. Remove the old liner from the car. Push up into the fender after placing the new liner in the wheel well.
6. Find each hole in the liner starting at either end and insert an opened retainer through it. Push the cap down after ensuring that the retainer is completely seated. As it sits, you should feel and hear a click.
7. Press each retainer into place as you move down the lining. For appropriate aerodynamics, you might need to carefully manoeuvre the liner around or under any air dams or belly pans at the front of the automobile.
8. The liner is held in place by all of the retainers. Hand tighten the lug nuts after installing the wheel. Lower the car by taking away the jack support. To the manufacturer’s standards, make sure the lug nuts are torqued.
Wrapping It Up
You just performed a totally easy fender liner replacement that will safeguard the more expensive components below your automobile.
