The final method is to drive the wheel and touch the ground before lifting the car with the floor. You will need to modify this method to tighten the nut when the work is done. It appears as soon as the CV joints nut is removed. Now the pivot focuses on the joint bearing.
All front-wheel drive and independent rear suspension cars come with the CV. Axis power is given to the wheels from the engine. The six balls inside the compound work universally, providing smooth rotation and allowing intense movement when in force.
There are two ways to get rid of CV joints problems. First, the boot grease tears and the joint lose its lubricating oil, which locks and vibrates the joint. The second way to fail on the CV axle is to prevent the car from moving.
These are the basic steps to replace CV Axle
1. Remove the nut cutter pin on the pivot
The outer axle has a cutter pin that protects it from the nut joint. Use a pair of side cutters to remove the cutter pin from the joints tip. There may also be a removable star wheel after the cutter pin.
2. Remove the CV joints nut
Three methods can be used to loosen the joints nut. The first way is to make it easier to show with an attack wrench. The next method is to prevent anyone from turning the axle when using the brake bar. The final method is to drive the wheel and touch the ground before lifting the car with the floor. You will need to modify this method to tighten the nut when the work is done. It appears as soon as the CV joints nut is removed. Now the pivot focuses on the joint bearing.
3. Disconnect the ball joint
The lower control arm must be disconnected to pull the strut out enough to exit the limb. To do this you need to deactivate the lower ball joint, which will allow space to remove the CV joints. The ball joint nut may or may not have a cotter pin, which must be removed to disassemble the ball joint. The ball joint nut without the cotter pin is self-locking and keeps in its place, so the cotter pin is not required. If there is a cutter pin, remove the pin from the ball joint with a pair of dice.
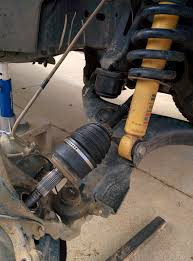
4. External CV.
Now that the lower control arm is loose, use a hammer to pull the spindle out of the car and pull the CV at the same time. Gently press the end of the joint tip. It pushes the axles out from the center of the wheel. This step should be very easy, if the joints seem to be trapped, use WD40 on the spline and let it sit for a few minutes before proceeding. It loosens any pillars in the spinal area. Don’t worry about destroying the mung bean threads, because the will replace it somehow. If you are reinstalling Print, install three turns on the print thread to protect the threads.
Some cars have an intermediate bearing mount that does not need to be adjusted to remove the axles. Use a 12mm or 14mm socket or wrench to remove these bolts. If the car does not have this bearing, the outer slit with a large pre-bar with a slit between the transmission case and the axle. This helps to remove the pivots from the transmission and remove the pivots. Hold the pivot while holding the outside loop and pull the pivots out of the transmitter.
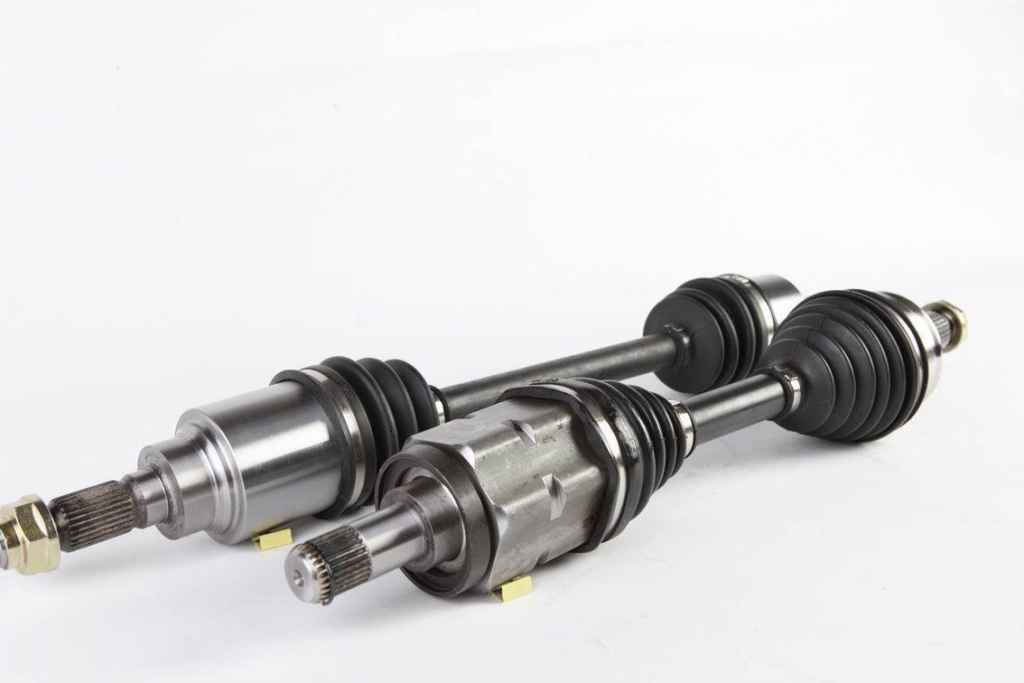
5. Replace the old CV axle with the new unit
Compare the new reinstallation axles with the old unit you replaced and they should match the same. Keep old prints in the box so you can return them to the payment center. Tip: Make sure the old pivot has an ABS stator ring, he has an external CV. The ABS system light turns on when the joint has a new print or work is completed.
6. Install the new CV axle
Hold the new pivot and be careful not to damage the transfer seal. The forward thrust must be connected to the pivot transmission along with the movement. It may take a small amount of juggling to get it fully transmitted, but it will remain there until the joint is fully installed. If the axle is not fully installed, it will protrude while driving, causing the car to stop.
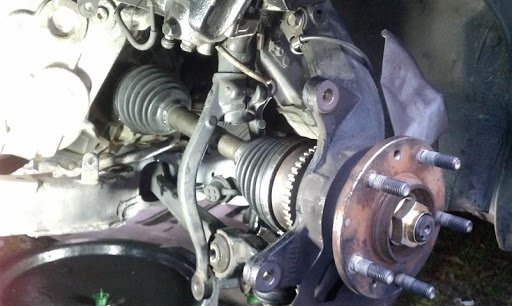
If so, reinstall the intermediate bearing mounting bolts and tighten them using the manufacturer’s feature, which is usually 22 to 24 pounds of torque.
Now the axis CV. Insert the outer bearing hub into the joint. You must rotate the hub to align the spindles and attach the hinges to the hub.
7. Attach the bottom ball joint again
When holding the lower control arm, apply the technique to rotate the lower ball joint, and then push up the control arm to install the ball joint nut. Use a large wrench to tighten the nut completely. Getting the torque wrench in the nut is very difficult, so it is necessary to determine its tightness for about 55 feet of torque and reinstall the new cotter pin if necessary.
8. Reinstall the nut on the CV pivot
Reinstall the joint nut by hand, and then the torque is usually 120 to 140 lbs. Install the new cutter pin, and then bend one end of the pivot and place it while cutting heavily, you are already. Reinstall the wheel when you safely lower the car from the jack stand.
Final words
When first driving the car, listen for any strange noises coming out of your cars CV Axle joints which mean the job will need to be rechecked.