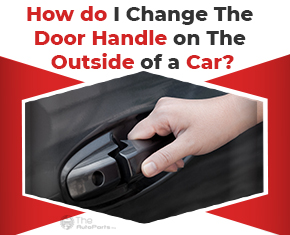
As they are so frequently used, outside automobile door handles occasionally break. If the door handles become loose or locked, they must be replaced.
Once you’ve owned your car for some time, you usually don’t give the door handle much thought—that is until you need to use it one day to enter and it seems “odd.” It doesn’t seem right, but you can’t quite identify why. Even if the handle appears to be in use, the door appears to still be locked.
You obviously try using the key or the remote a few times, but it doesn’t seem to be working—it appears you are locked out of your own automobile. It works when you try the other door or even the back door. Great! The center console or even the rear seat must be climbed over in order to enter and start your automobile. At least you can get in the vehicle and drive home, even though it’s at best embarrassing and at worst nearly impossible.
It’s possible that the inside door handle will fail first instead of the driver’s door handle; however, since the driver’s door is the one that gets the most use, this is typically the case. The majority of these handles are constructed of cheap cast metal or plastic, and after a number of uses, the business ends—the portion you can’t see—eventually breaks and separates.
Although the process for changing the handle varies from automobile to automobile and in some cases necessitates disassembling the inside of the door, many may be replaced quickly and simply from outside the door with just a few simple steps.
Part 1 of 1: The replacement of an automobile door handle
Resources Required:
1. Plaster tape
2. Tool for Phillips screwdriver
3. Substitute door handle
4. Set of 1/4 drive socket wrenches
Set of Torx bits
Step 1: Purchase a new door handle. Before beginning to disassemble anything, it’s a good idea to have the new door handle in your hands. This enables examination of the handle and some understanding of its attachment. On one or both ends, there could be fasteners.
If your vehicle has automated door locks, there can be little levers or even electrical connections that need to be linked, especially if the vehicle has a security system.
You can tell if the fasteners can be removed from the outside of the door or whether you need to start from the interior of the door by looking at how they are attached. If it has to be fixed from the inside, it is outside the purview of this essay.
If the handle does come with a lock cylinder, consult a parts expert to determine whether you want to use a separate key to open this door. Do you still desire access to your previous key? Most of the time, you may request that the cylinder be keyed to your current key by supplying the car’s serial number, but this normally necessitates a longer delivery time than a handle with a lock of its own and a set of keys.
In certain cases, replacing the old lock with a new one is doable if the lock cylinder is in excellent shape.
Step 2: Track down the fasteners. In most situations, a fastener may be found in the door jamb just next to the door handle. Even though it’s frequently concealed beneath a plastic plug, a piece of weatherstripping, or both, it’s typically not difficult to locate.
It will frequently be the only fastener used; but, in some instances, there may also be a screw at the front end. By observing the replacement handle, you can tell.
Step 3: Put painter’s tape down. It’s time to wrap the door handle with a little amount of painter’s tape before continuing. This will enable you to complete the task without damaging the paint. To protect the finish, use high-quality tape that can be removed without difficulty.
Use your screwdriver, socket set, or torx driver to remove the bolt at this point (s). The handle may be adjusted before and after being removed.
Step 4: Take the door handle off. The door handle may be slanted out of the way by sliding it toward the front of the vehicle.
When this is finished, the front of the handle will be able to slide out of the door similarly and will be free to move.
At this stage, any mechanisms that need to be detached will be obvious.
An automated door lock could have a plastic rod attached to it or a small pair of wires for the alarm. Most of the time, you can just snap them off with your fingertips.
Step 5: The order of the steps is not right, use step 4 twice: Changing the lock cylinder. If you’ve opted to replace your old lock cylinder, now is the moment. Insert the key into the lock and unclip the clasp that holds it in place. A clock spring and other devices may be added.
With the key still in place, carefully remove the cylinder and insert it into the new handle.
Warning: If you remove the key before the lock is in position, small bits and springs will fly all over the place!
Step 5: Install the doorknob. Assemble any rubber gaskets, then slide the tiny end (front) of the door handle into the slot first, followed by the big end.
Reattach any linkages or electrical connections before inserting the handle into the slot.
Looking into the hole, you should be able to see whatever mechanism the handle is supposed to contact; you may need to activate the lock or trigger to get the latch to engage the mechanism while inserting the handle.
Step 6: Fasteners should be installed. Place the fastener in the door jamb first, but do not tighten it yet. Check to ensure that the handle is securely positioned against the door. Install any fasteners on the front now, but don’t tighten them yet.
Tighten the fastener in the door jamb first, then any additional fasteners.
Test the door handle, the lock, and the alarm to ensure that everything is properly connected. When you’re finished, make sure to replace the plastic plugs that cover the holes.
Changing a door handle from the outside isn’t a difficult task, but if you’re like most people, you might not have the time. Alternatively, you may find yourself driving a vehicle whose door handle must be changed from the inside, which may be difficult for even the most skilled mechanics. In any case, you may bring your vehicle to the mechanic and get it fixed.