A windshield washer reservoir is intended to hold the washer liquid that cleans the windshield. The supply is of a hard plastic that is impervious to ethanol and ethylene glycol. The washer supply can deal with numerous kinds of conditions, however just when the reservoir has washer liquid in it constantly. When the washer liquid runs out and the reservoir is dry for a long time, the plastic dividers start to crumble from within and break.
Likewise, the mounting openings will in general break over the long run as the vehicle vibrates and releases the bolts that hold the reservoir to the vehicle. These circumstances can make openings that will make the windshield washer fizzle, implying that your vehicle won’t convey any washer liquid.
Techniques to replace your windshield washer reservoir
Step 1: Remove the reservoir bolts. Find the washer reservoir in the engine. Eliminate the bolts that protected the washer reservoir to the bumper or body of the vehicle.
Step 2: Remove the association with the washer siphon. Assuming there is a bridle plug on the washer siphon, eliminate the fitting. Assuming there is no bridle plug on the washer siphon, utilize side cutters and cut the wires.
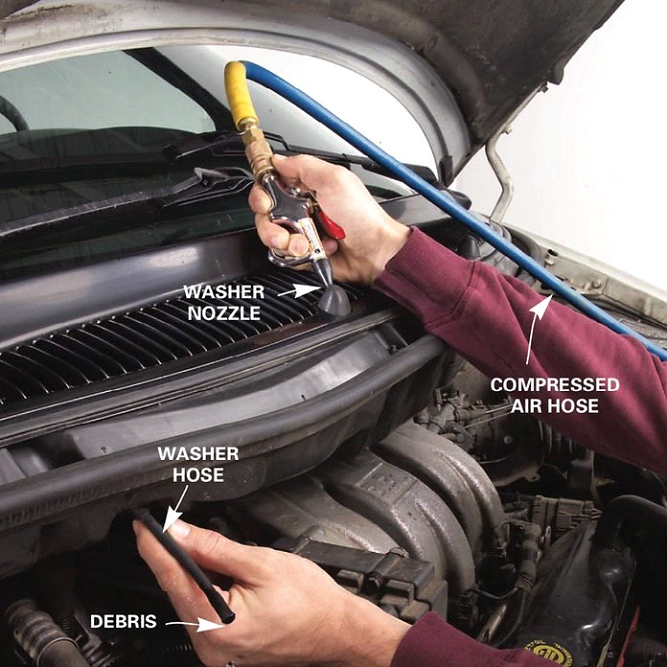
Step 3: Remove the washer liquid line from the reservoir. In case there is a clasp, you should utilize needle nosed pincers to eliminate the cinch and line.
Step 4: Pull the washer reservoir from the vehicle. Eliminate the washer siphon from the reservoir. Keep the siphon and dispose of the supply.
Step 5: Install the new washer supply. Introduce the washer reservoir on the bumper or body of motor compartment.
Step 6: Plug in the tackle to the washer siphon. In case you need to cut the wires, you should strip the wires with a wire stripper to the tackle and to the siphon. Supplement two butt connectors with heat recoil tubing and crease the wires to the butt connectors.
Step 7: Install the washer liquid line to the supply. In case you eliminated a cinch, you should utilize needle nosed pincers to introduce the clip and line.
Step 8: Refill the washer liquid. Get a gallon container of washer liquid. Empty the liquid into the supply and top it off.
Replacing the windshield washer supply in vehicles made after 1996
Step 1: Install a nine-volt battery saver into your cigarette lighter. This will keep your PC live and keep your settings current in the vehicle. In case you don’t have a nine-volt battery saver, you can finish the substitution without it; this simply makes it simpler.
Step 2: Disconnect the battery. Take the ground link off the battery’s adverse terminal, impairing the capacity to the start framework and windshield wiper framework.
Eliminating the washer reservoir from the upper motor compartment along the bumper
Step 1: Remove the bolts. Find the washer reservoir. Eliminate the bolts that protected the washer reservoir to the bumper or body of the vehicle.
Step 2: Remove the outfit plug. Eliminate the saddle plug associated with the washer siphon.
Step 3: Remove the washer liquid line from the supply. In case there is a cinch, you should utilize needle nosed pincers to eliminate the clasp and line.
Step 4: Pull the washer supply from the vehicle. Eliminate the washer siphon from the reservoir. Keep the siphon and dispose of the supply.
Step 5: Clean the contacts. Clean the contacts on the saddle plug and the contacts on the washer siphon.
Eliminating the washer supply from the wheel well or lower bumper under the vehicle
Step 1: Loosen the fasteners. Utilize a tire iron to extricate the fasteners on the tire and wheel that you need to take off. Ensure you leave the nuts on the wheel studs.
Step 2: Raise the vehicle. Utilizing a story jack that is suggested for the heaviness of the vehicle, lift the vehicle at its predetermined jacking focuses until the wheels are totally off the ground.
Step 3: The jack stands ought to go under the jacking point areas. Then, at that point bring down the vehicle onto the jack stands.
For most present day vehicles, the jacking focuses for jack stands will be on the squeeze weld simply under the entryways along the lower part of the vehicle.
Step 4: Remove the tire and wheel from the bumper well you are dealing with. You may need to eliminate the inward bumper to get to the washer reservoir.
Step 5: Remove the bolts. Eliminate the bolts that safe the washer reservoir to the bumper or body of the vehicle.
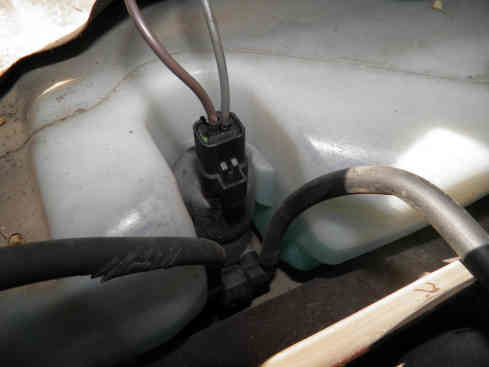
Step 6: Remove the bridle plug. Eliminate the outfit plug associated with the washer siphon.
Step 7: Remove the washer liquid line from the supply. In case there is a clip, you should utilize needle nosed forceps to eliminate the clasp and line.
Step 8: Pull the washer supply from the vehicle. Eliminate the washer siphon from the reservoir. Keep the siphon and dispose of the reservoir.
Step 9: Clean the contacts. Clean the contacts on the saddle plug and the contacts on the washer siphon.
In case the windshield washer reservoir keeps on spilling subsequent to supplanting the washer supply, then, at that point there might be different issues present. In case the issue continues, you should search out help from one of the confirmed mechanics at TheAutoPartsShop, who can supplant the windshield washer reservoir and analyse some other issues.